Pages

Showing posts with label 6pp. Show all posts

Monday, January 13, 2014

Pancetta & Asparagus Pizza

I love to take my standard homemade pizza recipe and come up with a new variation!  As we were trying to use up things from our fridge a few weeks ago, I came up with the idea of pairing asparagus and pancetta for a non-traditional pizza.  The possibilities really are endless, see what you can come up with to use up ingredients from your own fridge!

Servings:  8
Size:  1 slice of pizza
Points Plus: 6pp
Level of Difficulty:  Easy
Prep Time: 15 minutes
Cook Time:  15-20 minutes
Rating: 4 stars – Very good

Ingredient List:
1 can of Pillsbury refrigerated pizza dough, classic style crust
1 can pizza sauce (4 oz)
1 Tbsp. dried oregano
5 slices of pancetta
½ lb. asparagus, cut into ½ inch pieces
1 ½ cup shredded mozzarella, park-skim
½ cup shredded Parmesan cheese

Directions:
Open the can of pizza dough and shape into a pizza shape, gently working the dough outward on a lightly greased pizza pan.  Cook the crust according to the directions on the package, which suggests you pre-bake the crust for 5-7 minutes first before you add sauce and toppings.  While the crust is baking, bring a saucepan of water to a boil and add the prepared asparagus pieces.  Boil for 3 minutes; then drain and rinse with cold water.  Take the pizza out and evenly spread the can of pizza sauce on top of the crust, spread almost to the edges of the dough.  Sprinkle oregano over the pizza sauce.  Next, add the cheese, then add the cooked asparagus and slices of pancetta on top.  Bake for an additional 5-10 minutes or until the crust is a light golden brown.
Tip:
A good tip to make sure the asparagus stays crisp is to immediately rinse your cooked asparagus with cold water to stop the cooking process.  I thought this really helped to keep the asparagus from getting too mushy before they finished cooking with the pizza.  It’s kind of a variation of the blanching technique with vegetables!
XOXO Megan

Tuesday, January 7, 2014

Crockpot Chicken Tacos

Do you need a quick, go-to recipe for making chicken tacos??  Look no further!  This is a really easy version that using the crockpot to produce perfectly tender shredded chicken that is full of flavor.  My good friend Jessica gave me this recipe; I added in some additional onion and jalapeno.  I'm not sure I will ever go back to making chicken tacos any other way because these are so good!!!  You can customize with whatever your favorite taco toppings happen to be, but look below for my suggestions for this recipe.

Servings:  10
Size:  2 tacos
Points Plus: 6pp
Level of Difficulty:  Easy
Prep Time: 10 minutes
Cook Time:  4-5 hours
Rating: 5 stars – Excellent!

Ingredient List:
1 16 oz. jar salsa
1 packet of taco seasoning
¾ cup onion, chopped
¼ cup jalapeno, chopped
4 large chicken breasts
20 small flour tortillas
Optional Toppings (these are included in the pp value above):
1 cup Mexican blend shredded cheese, reduced-fat
1 can (4 oz.) sliced black olives
½ cup white onion, chopped
Fresh cilantro, chopped

Directions:
Add the full jar of salsa and taco seasoning to the crockpot; stir until well mixed.  Add in the chopped onion and jalapeno.  Finally, add in the chicken breasts and stir to make sure the salsa mixture is covering the chicken.  Set the crockpot on high for the first 2 hours and then finish on low for the next 2 hours.  Depending on how your crockpot cooks, wait until the chicken is fully cooked before removing to shred with a fork.  Add the shredded chicken back into the crockpot and cook on low or warm for an additional hour.  Serve with your favorite taco fixings and tortillas!  For the tacos above, I used 1 Tbsp. cheese, about 1/4 cup of chicken and just a sprinkle of olives per taco.  You can add as much onion and cilantro as you like! 
Tip:
Frozen chicken breasts work great in the crockpot!  If you haven’t had time to fully thaw out your chicken, not a big deal.  Just toss everything in the crockpot and set to low if you will be gone all day at work.  You will come home to a delicious smelling kitchen!
XOXO Megan

Thursday, December 5, 2013

Roasted Veggies + Arugula

Confession! This recipe was supposed to be a different recipe, however I forgot 3 key ingredients at the grocery store. So, here is an adapted easy weeknight dinner that can also help you clean out your fridge.  Salad topped with flavorful roasted veggies topped with fried egg (or poached if you arn't lazy like I am).  I accidently ate 18pp for lunch yesterday, so had to think up a very low pp dinner to compensate.  This was filling and tasty! Keep a lookout on the blog for the REAL recipe I was trying to post in a few weeks.

Servings: 2
Serving Size: 2 cups salad + 1 1/2 cup veggie mizture + 1 fried egg
Points Plus: 6pp
Level of Difficulty: Easy
Prep Time: 10 minutes
Cook time: 30 minutes
Rating: 3 stars - Good

Ingredients:
4 oz raw mushrooms, chopped
15 brussel sprouts, cleaned and cut in half
1 cup cherry tomatos, cut in half
1 t. olive oili
2 slices of turkey bacon, cut into small peices
1 T. fresh sage, chopped
2 eggs
4 cups arugula
Salt + Pepper to taste

Directions:
Preheat your oven to 400 degrees. Put your mushrooms, sprouts ad cherry tomatos in a baking pan and toss with 1 t. olive oil, salt and pepper. Roast for 30 minues. While veggies are roasting sautee turkey bacon and sage until cooked through, set aside. Heat a non-stick pan on your stove and fry two eggs.  To assemble (pretty simple), split your arugula between two bowls.  Top with roasted veggies and a fried egg.  add some hot sauce if you would like!

Tip:
As mentioned above, you can modify a recipe similar to this by using what is in your fridge! Let us know what veggies you try in it!

XOXO Katie

Tuesday, August 27, 2013

Bruschetta + Cherry Tomatoe Tapenade

This recipe is so delicious.  This is a recipe my mom found, here is the original recipe.  It is a fun take on the traditional bruschetta by turning the normal mixture into a tapenade instead.  Yum-o!

Servings: 8
Size:  2 slices of bread/bruschetta
Points Plus: 6pp
Level of Difficulty:  Easy
Prep Time: 10 minutes
Cook Time: 10 minutes (to grill the bread)
Rating: 4 stars – Very good

Ingredient List:
2 cups cherry tomatoes
½ cup kalamata olives, pitted
6 green onions, chopped
1/3 cup pine nuts
Fresh ground pepper
Kosher salt
8-10 fresh basil leaves, torn
½ cup olive oil
2 oz. block Parmesan cheese, cubed
1 French baguette

Directions:
Slice the baguette into 1 inch slices.  Brush olive oil onto each slice and lightly sprinkle with salt.  In a grill pan over medium-high heat, grill the bread slices until they have grill marks and are lightly browned.  In a food processor, combine the tomatoes, olives, green onions, pine nuts, a dash of salt and pepper, basil, olive oil and Parmesan cheese cubes.  Lightly pulse the food processor until all ingredients are chopped and well combined.  Scoop the tapenade into a medium bowl for serving purposes.  Serve each bread slice with a generous helping of tomato tapenade and enjoy!

Tip:

Be careful not to over-pulse in the food processor!  It can easily happen, but your tapenade should resemble more of a chunky texture.
XOXO Megan

Wednesday, July 24, 2013

Veggie Stuffed Tortillas

My mom told me about this recipe that she found in this summer’s Penzey’s spice recipe book.  It was a good light, vegetarian dinner recipe I made on Monday night.  I had a weekend full of eating, so this dinner was a good way to get back on track – the beans help to make for a satisfying meal that will keep you full and its relatively low in points!
 
Servings:  8
Size:  2 stuffed tortillas
Points Plus: 6pp
Level of Difficulty:  Easy
Prep Time: 30 minutes
Cook Time:  5-10 minutes
Rating: 4 stars – Very Good
 
Ingredient List:
2 Tbsp. EVOO
½ tsp. minced garlic
1 large onion, chopped
1 red bell pepper, chopped
1 medium zucchini or squash, sliced and quartered
½ cup chicken broth
1 15 oz. can corn, drained and rinsed
1 15 oz. can black beans, drained and rinsed
2 tsp. ground cumin
2 tsp. kosher salt
1 tsp. black pepper
1 ½ tsp. Arizona Dreaming (this is a specific spice blend from Penzey’s)
3 Tbsp. fresh cilantro, chopped
1 cup shredded cheese, reduced-fat
Salsa
16 corn tortillas

Directions:
In a large skillet, heat up 1 Tbsp. olive oil over medium heat.  Add garlic, onion, pepper, zucchini and ¼ cup of chicken broth to the pan.  Sauté the veggies until they are tender.  Add the drained and rinsed corn and beans to the pan and the remaining ¼ cup chicken broth (the liquid will cook down).  Next add in the spices – cumin, Arizona Dreaming and salt and pepper.  Make sure to stir well so the spices are mixed throughout the veggies.  Stir in fresh cilantro.  Total cooking time for the tortilla stuffing is about 10-12 minutes.  In a small skillet, heat up the remaining olive oil.  Place one tortilla in the pan and cook until the bottom is lightly browned.  Sprinkle some shredded cheese on one ½ of the tortilla and then scoop about ¼ cup of the vegetable filling onto the tortilla.  Fold the tortilla in half and press down with a spatula so it resembles the look of a quesadilla.  Heat the tortilla for about a minute before moving on to the next stuffed tortilla.  Serve with salsa and additional cheese on top if you prefer!
Tip:
The first one or two tortillas might be difficult to get perefectly browned or to fold in half easily - keep at it and you should be able to get it right.  Try adjusting the heat either up or down too to achieve lightly browned tortillas.

XOXO Megan

Monday, July 15, 2013

Sausage Spaghetti Squash

This was my first attempt at cooking a paleo recipe (at least knowingly), and it was so good! First, have you ever cooked spaghetti squash?  Once you roast this unique squash you remove the insides with a fork, and they really do resemble spaghetti.  Anyone who tells you that it TASTES like spaghetti is lying, but it is a fun and healthy alternative to the noodle.  The squash, based off this recipe,  is jazzed up with some spicy Italian sausage and kale, and has a slight Thai twist with the addition of coconut milk.

Servings: 4
Size: 1 1/2 cup
Points Plus: 4pp
Level of Difficulty: Medium
Prep Time: 15 minutes
Cook Time: 1 hour
Rating: 4 stars - Very Good

Ingredient List:
1 Italian sausage (I used 7pp of sausage)
1 Medium spaghetti squash, halved and seeds removed
1 Bundle of kale, roughly chopped
1/2 Red onion
1/3 c. chicken broth
1/2 c. canned coconut milk, light
1 Clove garlic, minced
1 T. garlic powder
1 t. tarragon
1 t. salt (more to taste)
1/2 t. black pepper
1/4 t. ground sage
1 Green onion, white and green part

Directions:
Preheat oven to 400 degrees.  Roast squash, cut side down for 40 minutes. When cooked remove, flip to cut side up, and let cool so you can handle it.

While squash cooks, cook sausage, breaking up into small pieces.  When cooked remove from pan and set aside.  Add garlic, kale, onion and chicken broth to pot and stir. Add coconut milk and spices, cover and let simmer about 7 minutes.

When you can handle squash pull it apart with a fork (de-thread).  Add squash and sausage back to pot and mix well.  Top with onions and serve!

Tip:
I packed this in my lunch today, this is a really big deal!  I never pack my lunch, ever!!  I divided up the leftovers into individually portioned glass pyrex so it was easy to grab this morning.  If anyone has any tips for packing a lunch please PLEASE let me know! I feel like when I pack my lunch it doesn't make me full, but when I go out to my normal, WW friendly lunch spots it does!  I think it is all in my head...

XOXO - Katie

Friday, June 28, 2013

Greek Chopped Salad

A Greek salad is my go to salad – I never get sick of the combination of these ingredients!  Although chopped salads require extra prep since you have lots of veggies to wash and chop, I think they are well worth it and delicious.

Servings:  2
Size:  Main course salad
Points Plus: 6pp (does not include pp value for dressing)
Level of Difficulty:  Easy
Prep Time: 20 minutes
Cook Time:  n/a
Rating: 4 stars – Very good

Ingredient List:
Chopped romaine
1 cup cucumber, chopped
1 cup red bell pepper, chopped
½ cup celery, chopped
1 cup chickpeas, rinsed and drained
1 cup grape tomatoes, halved
½ cup crumbled feta, reduced-fat
12 Kalamata olives, halved

Directions:
Chop up hearts of romaine and plate out portions for two main course salads. Wash and chop up your other veggies (cucumber, bell pepper, celery and grape tomatoes), make sure they are chopped into smaller pieces since this is a chopped salad.  Open a can of chickpeas and rinse and drain.  Slice the olives in half.  Throw everything into a large bowl to mix thoroughly.  Add in the crumbled feta and serve with your favorite dressing – I would recommend some sort of vinaigrette.
 
XOXO Megan

Monday, June 24, 2013

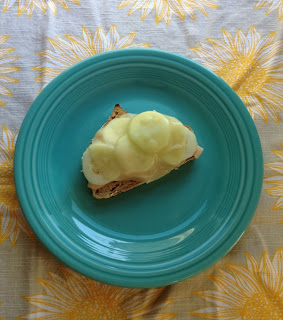
Good Earth Turkey Sandwiches

This is a great lunch recipe and it happens to be my mom’s signature dish!  She loves to make these sandwiches.  A good hearty multi-grain bread works best with this recipe, especially since sandwich is open-faced so you are only eating one slice of bread. 
Servings:  2
Size:  1 open-faced sandwich
Points Plus: 6pp
Level of Difficulty:  Easy
Prep Time: 5 minutes
Cook Time:  5 minutes
Rating: 4 stars – Very good

Ingredient List:
2 slices of multi-grain or harvest bread
2 Tbsp. stone-ground mustard
4 ounces turkey, deli meat
Cucumber, thinly sliced
2 slices provolone, reduced fat

Directions:
Toast the bread slices in the toaster.  Spread a layer of stone-ground mustard on one side of each slice.  Layer on 2 ounces of turkey, top with a layer of thinly sliced cucumber slices.  Finally, top each open faced sandwich with a slice of provolone cheese.  Broil the sandwiches for about 5 minutes or until the cheese is melted.
Tip:
You can really amp up the veggies on these sandwiches if you want.  I normally make them with sprouts, but didn’t find any at the store when I was shopping last.  You can add sprouts, sliced tomatoes, or even green peppers –all without adding any additional points to your meal!
XOXO Megan

Thursday, June 20, 2013

English Muffin Pizzas

This is such an easy, quick dinner for when you are short on time!  Mini pizzas in the form of English muffins are a fun take and a lighter, healthier option if you are craving pizza.  Topping options are unlimited with this recipe too – just substitute whatever you are in the mood for or whatever is in your fridge.
Servings:  2
Size:  2 open-faced English muffin halves
Points Plus: 6pp
Level of Difficulty:  Easy
Prep Time: 5 minutes
Cook Time:  5 minutes
Rating: 3 stars - Good

Ingredient List:
2 English muffins
2 Tbsp. pizza sauce
Dried oregano

2 oz. mozzarella cheese, reduced fat
12 slices turkey pepperoni

Directions:
Toast the English muffins in your toaster.  Spread pizza sauce on each half.  Sprinkle some dried oregano on top of the sauce, this really helps bring out the pizza taste to these mini pizzas.  Next, top with cheese, split evenly across the 4 halves. Finally, add 3 slices of turkey pepperoni to each mini pizza.  Place pizzas on a cooking sheet and broil for 5 minutes or until the cheese is melted.

Tip:
Turkey pepperoni is a healhty option and a great way to save points!  If you haven't tried it before, you should.  You will be amazed at how much it tastes like regular pepperoni.

XOXO Megan

Tuesday, June 18, 2013

Blueberry Breakfast Cake

Everyone needs a signature dish!  What is a signature dish you might ask?  Well it is recipe that you can make quickly and is something you can make well.  And it really becomes your signature dish when people come to know and remember you for this particular recipe!
This delicious breakfast cake might very well be my own signature dish.  It is SO good!  The cake’s consistency is moist, yet light and fluffy all rolled into one.  It’s kind of cross between a muffin and a coffee cake.  I came across this recipe on Pinterest and tried it out for a weekend visit from my family.  Soon after this visit, this recipe quickly became one of our favorites!
Servings:  12
Size:  1/12 of an 8x8 pan
Points Plus: 6pp
Level of Difficulty:  Easy
Prep Time: 15 minutes
Bake Time: 35-45 minutes
Rating: 5 stars – Excellent

Ingredient List:
½ cup unsalted butter
2 tsp. lemon zest
¾ cup sugar (+ 2 Tbsp. to sprinkle on top of cake)
1 egg
1 tsp. vanilla
2 cups flour (reserve ¼ cup to toss the blueberries in)
2 tsp. baking powder
1 tsp. kosher salt
2 cups blueberries, fresh berries
½ cup buttermilk
Cooking spray

Directions:
Preheat the oven to 350°.  In a large bowl, mix together the butter, lemon zest and ¾ cup sugar with a mixer until the texture is light and fluffy.  Add the egg, vanilla and beat until well mixed through.  Wash the blueberries and lightly pat dry with a paper towel.  In a cereal bowl, toss the blueberries in ¼ cup of flour (this helps the blueberries to stay whole and got get smashed and bleed into the rest of the cake).  Whisk together the remaining flour (1 ¾ cups), baking powder and salt in a medium sized bowl.  Add half of flour mixture to the butter/sugar mixture, mix well.  Next add ¼ cup of buttermilk to the batter.  Repeat these steps with the remaining flour mixture and buttermilk.  Using a technique of alternating your dry ingredients with buttermilk allows for easier mixing for your cake batter.  Once the batter is mixed well, use a large spatula to gently fold in the blueberries.  You will likely have leftover flour from the ¼ cup you used to toss the berries – you don’t need to add all of it into the batter.  Spray an 8x8 pan with cooking spray.  Spread batter evenly into the pan.  The batter consistency will be quite thick.  Sprinkle 2 Tbsp. of sugar on top of the cake.  Bake for 35-40 minutes, until the top is golden brown.  Use a toothpick to check to see if it comes out clean.  Depending on your oven, it may need to bake for an additional 5-10 minutes.
Tip:
Use this lemon zester I told you about last week to make zesting the lemon a breeze!
This recipe can EASILY be doubled and made in a 9x13 pan instead of the 8x8!  If you are serving this for a brunch I would recommend going with the doubled version since people will want seconds.

XOXO Megan

Wednesday, June 12, 2013

Buffalo Stuffed Chicken Breasts

Stuffed chicken breasts are a fun spin on chicken.  These use traditional buffalo wing flavors of hot sauce, celery, carrot and blue cheese.  This recipe is from Skinnytaste with some slight adaptations – I chose to cut out the shredded cheddar in the stuffing mixture, used sour cream instead of mayo for breading the chicken and slightly increased the size of each chicken breast.
Note: If you buy thicker chicken breasts, have the butcher at the grocery store slice them in half length-wise to end up with 4 thinner chicken breasts which will work great for stuffing!
Servings:  4
Size:  1 stuffed chicken breast
Points Plus: 6pp
Level of Difficulty:  Easy
Prep Time: 15 minutes
Cook Time: 35 minutes

Ingredient List:
4 thin chicken breasts (4 oz. each)
⅓ cup carrot, minced
⅓ cup celery, minced
⅓ cup green onions, chopped
4 wedges Laughing Cow blue cheese
Salt and pepper
15 Ritz crackers, reduced fat
1 Tbsp. light sour cream
1 Tbsp. lemon juice
Frank’s hot sauce
Cooking spray

Directions:
Preheat oven to 400°. Use cooking spray to lightly grease a baking dish.  In a small bowl, mix together the carrot, celery, green onions and Laughing Cow cheese.  Divide this mixture evenly between the 4 thin chicken breasts, then roll-up each cutlet to make a stuffed chicken breast.  Crush the Ritz crackers in a ziplock bag to make a crumb mixture for your chicken breading.  In a small bowl, mix together the sour cream, lemon juice and 1-2 Tbsp. of hot sauce based on your preference.  Set up an assembly line for breading your stuffed chicken breasts.  First roll each in the hot sauce mixture, then the cracker crumbs, making sure the crumbs evenly coat the chicken.  Lay the chicken in a baking dish, seam side down so they don’t open up.  Bake for 30-35 minutes, or until chicken is cooked through.  Drizzle the top with additional hot sauce for more buffalo flavor.
Tip:
An easy side dish to serve with this meal that doesn’t require many extra ingredients is a side salad of cucumbers, celery and carrot with light blue cheese dresses.  We had it just as an all veggie salad, but you could serve it over romaine lettuce too.

XOXO Megan

Monday, June 10, 2013

Scallion, Egg & Tomato Sandwiches

Looking for a quick lunch idea?  These sandwiches are easy to make and don’t take too many ingredients. I took a Skinnytaste recipe found here, and made some modifications.  I substituted reduced fat cream cheese in for the mayo and used English muffins instead of sandwich rolls.  We almost always have English muffins on hand so these were an easy change – I rarely buy sandwich rolls.  These would make a great light dinner on nights when it’s hot and you don’t want to turn the oven on!
Servings:  2
Size:  2 open-faced English muffin halves
Points Plus: 6pp
Level of Difficulty:  Easy
Prep Time: 20 minutes
Cook Time:  n/a
Rating: 3 stars - Good

Ingredient List:
2 English muffins
2 Tbsp. cream cheese, 1/3 less fat
Tomato
Scallions, chopped
2 hard-boiled eggs, sliced
Salt and pepper

Directions:
Hard boil the eggs, let them cool before slicing.  Toast the English muffins.  Spread about ½ Tbsp. of cream cheese on each English muffin half.  Wash and chop the scallions and slice the tomato.  Assemble each open faced sandwich by putting scallions first, then tomato and finally egg on top.  Season with salt and pepper to taste.
Tip:
Of course you can assemble the sandwich any way you like, but after making these the first time I switched up the order to follow the directions above.  My ingredients were all over the plate instead of staying put on the sandwich.  By starting with the scallions, they will stick to the cream cheese instead of falling off.  The weight of the egg also helps hold the tomato slices in place too.
XOXO Megan

Wednesday, May 22, 2013

Jalapeño, Sausage & Egg Breakfast Braid

I love to find new breakfast recipes to try out!  I came across this recipe in Cooking Light and tested it out for a summer cabin trip a few years ago.  It’s easy, yet looks pretty impressive, and sounds like it too (breakfast braid sounds kind of fancy to me at least!).  This breakfast dish quickly became a favorite and is a go-to staple if I’m having company and I want to serve something for breakfast or brunch.

Servings:  8
Size:  1/8 of the breakfast braid
Points Plus: 6 pp
Level of Difficulty:  Medium
Prep Time: 20 minutes
Cook Time:  15 minutes
Rating: 5 stars – Excellent

Ingredient List:
1 can refrigerated pizza crust dough
Cooking spray
1 Tbsp. olive oil
¼ cup onion, chopped
4 oz. chicken sausage with jalapeños, chopped
2 large eggs, lightly beaten
½ cup shredded Monterey Jack cheese
¼ cup shredded cheddar cheese
¼ cup jalapeño peppers, chopped and seeded
1 large egg white, lightly beaten

Directions:
Preheat oven to 425°. Unroll the pizza dough onto a baking sheet coated with cooking spray.  Shape dough into a 15x10 inch rectangle.  Heat oil in a large skillet over medium heat.  Add the onion and sausage; cook about 10 minutes or until lightly browned. Stir in the eggs, cook another 1-2 minutes or until the eggs set.  Remove from heat.  Sprinkle Monterey Jack cheese lengthwise down the center of the dough, leave about a 2 ½ inch boarder on each side.  Spoon the egg/sausage mixture evenly over the cheese.  Sprinkle cheddar cheese on top of the egg mixture; top with jalapeño peppers.  Make 2 inch long diagonal cuts about 1 inch apart on both sides of the dough to within ½ inch of the filling.  Arrange the strips over the filling, alternating sides to make the appearance look like a braid.  Press the ends to seal.  Brush the top of the braid with egg white to ensure a nice browned crust.  Bake for 15 minutes or until golden brown.  Let stand for 5 minutes before cutting into slices.
Tip:
To make the cuts in the pizza dough to form the braid, kitchen scissors work REALLY well!  Simply snip out even strips to make your braid.  The scissors will help the dough for tearing or getting stretched out so you end up with a nice looking braid to serve your company!
XOXO Megan
 

LinkWithin

Related Posts Plugin for WordPress, Blogger...